“Too Hot to Handle!” Summer heat may melt your treats. Please unwrap with care and pop them in the fridge if needed. We are not liable for melting during the shipping process. Dismiss
Skip to content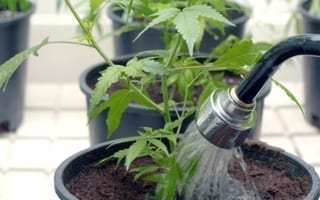
Share
If you enjoy smoking cannabis, chances are you have thought about growing your own weed. Now that legally growing your own cannabis is finally allowed many are ready and eager to give this new fun hobby a try.
For most, the idea of growing cannabis can seem like a very complicated process, however it is actually quite straightforward. As long as you put enough time and effort into the growing process, your harvest will be a success.
Do you want to grow your own cannabis but you’re not sure how? Look no further! This step-by-step guide will tell you everything you need to know about growing your own cannabis, the best way for your unique situation and as clearly as possible.
Are your thumbs feeling green yet? Well, first we need to understand what a cannabis plant needs to flourish?
Whether you plan growing indoor or outdoors, you will need to make certain your plant is provided with
LIGHT – As light is arguably the most important factor that could affect the growth of your cannabis plants, a proper understanding of both sunlight and grow lights is essential.
MEDIUM – Soil is one medium option, but is not your sole choice for growing cannabis. Choosing the best medium is very important to the overall development of the plants.
AIR – An open space with appropriate ventilation, good air flow and a slight breeze is ideal.
TEMPERATURE – Cannabis plants can die if they are subjected to extreme temperatures. If it’s comfortable for you then it should be good for your plants.
NUTRIENTS – Thrive is a simple 2 part dry concentrate nutrient that will provide your plant with everything it will need from seed to harvest.
WATER – Water is water, right? Wrong. The quality of water you use to grow your plants can either help or hinder your garden.
On average, it can take approximately 4 months to grow, harvest and cure cannabis – however indoor grows tend to have shorter grow times as you have more control over when the plant begins to bud. Outdoor grows, and certain strains can take upwards of 7 months. If time is a factor for you, with the right tools and environment, you can grow in as little as 8 weeks.
One way to do this is with auto-flowering seeds. Auto-flowering grows also tend to be very short in comparison to the average. However, it should be noted that with shorter grows, you also tend to get smaller yields. Certain strains and certain outdoor grows can take up to 7 months or more.
EXPERIMENTS: A common mistake by new growers is performing in-the-moment experiments, leading to harmful outcomes. Before taking action do some research or ask another grower if it is something they have tried – chances are someone has, and they will save you from potentially killing your plants!
RUSHING THROUGH IT: You may get lucky and successfully grow weed without taking all the necessary steps, however you are taking a risk that your plants will end up malnourished or unproductive. Make sure you don’t miss a step in this guide so that you can yield your very own quality bud!
REMAINING SILENT: Do you have a question? Don’t be shy – ask away.
OKAY, LET’S GROW SOME WEED!
This option gives you much more control over your grow and is relatively inexpensive to start and maintain, especially if you are only growing the legal maximum of 4 plants. Although using an indoor growing environment will provide more consistency and probability of top-quality cannabis, it will take more work on your part as it is 100% your responsibility to ensure their survival.
What are some indoor space options?
You can grow indoors in any space with access to water and air, including but not limited to:
– Room
– Closet
– Garage
– Grow tents
– Bathroom
1. The temperature of your indoor space is very important, therefore, it’s best to choose a space that you have control over.
2. It is important to remember that depending on how powerful the lights are, the temperature will likely rise once you have them running.
3. If you install many lights in a small space, you may need to install an air conditioner in addition to your exhaust system to ensure you keep your temperature in the right range.
4. Young cannabis plants grow fastest when the temperature is a bit warmer. (20-30°C range.)
5. Older cannabis plants (ones in the budding/flowering stage), will fair favourably in slightly cooler temperature (18-26°C range)
6. For small grows, such as those in tents, a fan can be used to pull the heat away from the hot lights.
7. Some lights cause more heat problems than others, therefore it is important to research to best lights for your space
For beginner growers with limited financial resources and/or indoor space restrictions, an indoor grow may not be the ideal option. Thankfully, a small outdoor garden can yield plenty of cannabis without a large monetary investment. Although growing outdoors is cost effective to start, there are other factors you will need to consider:
1. Privacy/Theft
2. Possible pollination
3. Unexpected four-legged visitors.
– With the right strain and optimal environment, it may be cheaper to grow outdoors, as you will not need all the necessary equipment and attention that is required for an indoor grow.
– The sun will do most of the work for you.
– You will need to work with Mother Nature by balancing dry days with extra water and rainy days with some protection from getting overwatered.
– If the temperatures are extreme where you live, you may need to take precautions from the elements and set up a small greenhouse.
Lighting, its kind of a big deal. Improper lighting can lead to small harvest, or a complete growth fail. Fortunately, there is a wide range of options available for you to choose to help you grow some healthy plants:
THE SUN – For best results ensure that your plants are getting a minimum of 8 hours of direct sunlight each day. It is also best that your plants exposer is from 10am-4pm. The cannabis plant needs more light than most other types of plants, and therefore may not survive by the window, although this may be a good spot to start growing seeds until a more suitable final location is found.
COMPACT FLUORESCENT LIGHT BULBS (CFLs) – Easily attainable and affordable, CFL’s are a top choice for those just starting out. CFL’s however, lack the power of high quality grow lights.
FLUORESCENT LIGHTING (T5/T8) – This lighting works best for plants that do not need as much light as cannabis, as they have a short light brightness range and must be kept very close to the tops of your plants. However, If using fluorescent lighting is a must, try a High-Output T5 light and then switch to a stronger grow light for the flowering.
LED – These lights ofter more power than other fluorescent lighting options and are also much more expensive. With each LED model having their differences, there is no standard distance away from your cannabis that can be followed. It is highly recommended to purchase LED lights from brands which are well-tested and trusted – and can offer good support for questions.
LEC (CMH) – Light Emitting Ceramic, or LEC is a brand name for a type of light – (CMH or Ceramic Metal Halide). These lights have regained popularity and are thought to have a few positive traits that surpass HPS lighting. Similar to HPS lighting, they are still somewhat less efficient, although they are not as loud and the colour is more natural and less obvious.
METAL HALIDE (MH) & HIGH-PRESSURE SODIUM (HPS) – Also known as “HID” lights, MH/HPS grow lights are widely recognized as the best choice for indoor grow lights. Not only are they inexpensive to buy, but they are easy to set up, incredibly powerful and produce consistently good results. However, due to the higher wattage, HID lights can reak havoc on your electricity bill, so you’ll want to ensure you have right lights for your specific space. It should be noted that the smaller grow lights do not produce as much heat as the 1000w.
The medium is where your marijuana plant will do its growing. There are different mediums which you can use for growing cannabis, such as soil, hydroponics or a soilless mix. It is important to get the best medium to ensure a strong root system and full development of the plants.
These are the most common grow mediums and their care and watering requirements.
1. Soil – The most common medium used in growing cannabis due to its availability. Organic composted soil will provide incredible taste results, however this medium may contain soil-borne diseases that can harm your marijuana plants. If your soil options are limited, an organic potting mix will suffice as long as you use a good nutrient (more on that below).
2. Soilless Mix – Technically considered hydroponic growing (since there’s no soil), a soilless mix includes anything besides soil including coco coir, perlite, vermiculite, to name a few. Soilless mediums are usually peat or sphagnum-based mixtures that have the look and feel like real soil. To aide in aeration and to retain moisture, these mixtures have organic additives such as coco-coir, perlite or wood chips. This medium choice offers great flexibility and allows the grower to customize their blends with various additions.
3. Hydroponics – Hydroponics, is the soilless growth of plants – or growing directly in water. This method has been known to have some of the fastest growth and biggest yields, especially when combined with HID grow lights. One of the key characteristics of the hydroponic method of growing is that it is known to produce high quality bud in less then favourable environments. While the list of advantages is long, hydroponics does not come without its problems. It has a place to fill special needs, but is still a long way from replacing traditional soil-based methods. This method will require more investment and skills.
4. Uncommon Types of Hydro – Some people grow with plant in no medium at all, but where the roots are suspended in misted air (aeroponics). While others grow in fish tanks (aquaponics). These methods of growing are advanced and the growers should have a considerable knowledge of cannabis and have a reasonable amount of funds to produce a quality product.
The majority of Cannabis nutrient companies would have you believe that in order to grow a healthy plant and harvest big flourishing yields, you will need up to 15 different types of nutrients. That is simply not the case and unfortunately, just a money grab. Medicinal Marijuana can be simple and very rewarding to grow. The three main things that your marijuana plants needs are: Good genetics, a suitable environment (whether it be indoor or outdoor) and a good quality nutrition.
SOIL GROWERS – If you are growing with soil, you will need to use nutrients made for soil, and continue to add nutrients once you reach the flowering/budding stage. Cannabis plants require a lot of food, and most of the nutrients in the soil will have been used by the time budding begins. King Tuts offers Thrive, a simple 2 part nutrient program that provides complete nutrition for your soil and Coco plants. Thrive is an extremely potent, stand-alone, water-soluble, dry concentrate nutrient (just add water). King Tuts Thrive is complete in primary, secondary and micro nutrients and is pH-buffered. Thrive is all the food your plants will need from seed to harvest.
Seed/Veg Part 1.
Use King Tuts Thrive Part 1 from seedling until two weeks into
flowering. During the seedling stage, mix 1/2 TBL per gallon. After
seedling, begin to use 1 TBL per gallon. Mix well.
Flower Part 2.
Start step 2 of King Tuts Thrive two weeks into the flowering period.
Use until you are ready to flush. Mix 1TBL per gallon. Mix well. It
is recommended to flush, using only water as your marijuana
plant’s food for one – two weeks before harvest.
HYDROPONIC GROWERS –- If you are growing in a medium besides soil, you will also want to get specific nutrients made for hydroponics.
There is one basic decision you will eventually face before you begin to grow, will you use seeds or clones? Here are the most significant pros and cons of marijuana seeds and clones.
SEEDS
Benefits:
A stronger, taller plant;
A larger yield;
A possibility to experience the full growth cycle: from seed to bud.
Drawbacks:
Potential for poor seed quality
If you are not using feminized seeds, you will have to throw away about a half of your plants because they will most likely be male plants.
CLONES
Benefits:
By cloning a female plant you will reliably receive a female plant.
A clone has the exact same DNA that the mother plant has, so there will be no unexpected outcomes.
A cloned plant is ready for harvest sooner.
Drawbacks:
Beside inheriting the potency and flavor of the mother plant, a cloned plant also inherits all the diseases and pests. MAKE SURE THAT YOUR CLONE COMES FROM A HEALTHY PLANT.
More advanced then growing seeds.
Clones do not respond well to a long-distance shipment.
If you are using a clone, skip to Step 7.
If you have decided to grow your cannabis from seed, but are unfamiliar with germination, there is no need to worry! Germinating your seeds is not difficult and there are numerous ways to do it. Generally, everything you will need is water, air, and heat.
OPTION 1:
Personally, we think one of the easiest ways to germinate a cannabis seed is to place it directly in a specialized starter cube.
Keep your starter cubes moist (without soaking them) and warm. Seedlings should pop in a few days to a week.
OPTION 2:
Another popular way to germinate seeds is via the paper towel method.
You will need:
– Cannabis seeds
– Two plates
– Paper towels
– Water
– A place to plant sprouted seeds
Directions:
Step 1) Place seeds on moistened paper towel. Fold over and place on plate
Step 2) Cover with another plate to keep moisture locked in. Check regularly to see if seeds have sprouted.
Step 3) Seeds often sport in 1-4 days. Although some, like olde seeds, may take up to a week.
Step 4) Make a small hole in a moist growing medium, about 1 inch deep. Gently place spouted seed, root down, into the hole. Cover and lightly pat down.
Step 5) the seedling emerges from growing medium with two smooth seedling leaves. Place lights 2 inches away. Keep lights on for 24 hours a day.
Step 6) Seedling will grow first two adult leaves, signalling start of the vegetative stage. Keep moving lights to maintain distance.
NOTE: If you notice the seedlings are “stretching” upwards or growing very tall, they want more light.
The marijuana vegetative stage is when the energy produced by the plant is put into growing healthy roots, stems, and leaves which support the buds created in the flowering stage of marijuana growth. When your plant grows its first set of adult leaves and developes its rooting system, it can be considered to be in the vegetative stage.
Temperature: A young cannabis plants will grow faster in temperatures a bit warmer than room temperature, around 20-30°C.
Nutrients: If you’re feeding your plant with additional nutrients, Use King Tuts Thrive Part 1 from seedling until two weeks into flowering. During the seedling stage, mix 1/2TBL per gallon. After seedling, begin to use 1TBL per gallon. Mix well.
Light: Give plants 18-24 hours/light a day in the vegetative stage when growing indoors. If growing outdoors, try to make sure your plant gets strong, direct light for most of the day, especially from 10am-4pm.
Flowering marijuana is when a the marijuana plant starts to produce buds and is the final stage before harvesting.
During this stage, you will need to…
1. Change your light schedule:
When growing indoors, you must switch to a 12-12 light schedule, meaning 12 hours of light & 12 hours of uninterrupted darkness each day (this can be done on a timer.) This gets your cannabis to start flowering. If you are growing outdoors, your weed will naturally start flowering when the days get short, typically a few months before winter.
2. Identify the gender of the plants:
The flowering stage is when the gender of the plant is revealed as male or female.
Female plants – One definite way to detect if a plant is female will be the appearance of its sex organs, named pistils. These tiny white or orange hairs are the sex organs of female plants. Pistils will start to emerge at internodes, sections where branches intersect with the main stem, at around 1.5 weeks into the flowering stage. Female flowers produce small tear-like calyxes with two pistils at this stage which will eventually grow and form together into what is commonly referred to as Buds.
Male plants – Males look aesthetically different from their female counterparts. While the female’s flowers are glistening with resin, male flowers will produce bell-like clusters known as pollen sacks that hang down. Most male plants do not develop psychoactive properties as females do, furthermore, male plants can pollinate “impregnate” your female plants and cause them to make less bud and more seeds. Therefore, most cannabis growers opt to remove the male plants as soon as they show their gender.
3. Remove the Males:
When growing cannabis you must ensure that all male plants are removed from the female grow room before the release of any pollen. Failing to remove males soon enough will render the grow useless for the production of high-quality flowers. A little pollen can go a very long way and completely seed all females in the room.
Once you have gotten rid of your male plants, your female plants will be growing more and more white hairs and before you know it, actual buds/flowers/trees will form.
THINGS TO NOTE:
Once in the flowering stage, it is best to keep temperatures slightly cooler, around 18-26°C in order to produce buds with the best color, trichome production and smell.
Cannabis plants in the flowering stage are much more likely to suffer from nutrient problems as they’re focusing all their energy on growing buds. Give them lots of attention.
Knowing when the right time to harvest your plants may be one of the hardest parts of growing cannabis, as this is the crucial point in your season that can either improve or ruin all your weeks of work and care.
We recommend harvesting your plants depending on the desired effect and psychoactivity peaks during the last weeks of flowering. There are two methods you can use:
Wait until at least 40% of the white hairs have changed colour (darkened) and are curling in. This marks the beginning of the harvest window. Buds harvested now will have more of a speedy effect and are not at full potency.
Harvest when 50-70% of the hairs have darkened for highest THC levels
Harvest when 80-90% of the hairs have darkened for more a couch lock, anti-anxiety effect (some of the THC has turned into the more relaxing CBN)
Clear trichomes – Not ready, extremely low potency
Trichomes are cloudy, with some clear parts – Beginning of your harvest window, fairly low potency. Energetic high
Trichomes are very cloudy – Optimum harvesting time, potency will be at its highest. THC count and pain-relieving effects will be at their most beneficial
Trichomes have turned an amber colour – The very end of your harvest window, some potency. Will offer a “couch-lock” effect as opposed to an energetic high.
Hang buds upside down in a cool, dark place with plenty of ventilation so that they can dry out.
Dry buds slowly for best results and check often for mold or overdrying.
Once dried (thin stems snap, but the thicker stems are still a bit bendy.), it’s time to start curing.
To cure, put buds in tightly closed mason jars in a cool dark place. Fill each jar loosely about 3/4 of the way full.
For the first 2 weeks, open the jars once a day for several seconds to let in fresh air and release any moisture.
If your buds feel moist, leave the tops of the jars off until the outsides of the buds feel dry to the touch. Too-moist bud is what causes mold!
Boveda Humidipaks are helpful in curing, as they will naturally regulate the humidity in your jars.
5. After your cannabis has been curing for at least 2 weeks, and no longer feel wet every time you’ve checked them, you can start opening the lid once a week instead of once a day.
Cannabis that has been over-cured can become less potent over time as THC turns to CBN. Sampling some as it’s curing is a good way to gauge whether it’s done or not. Keep your harvest in a cool, dry, airtight space for long-term storage.
Sign up and get first access to our newest strains, products and exclusive discounts.
Helpful links


29 Responses
Grew my first plant last summer outside and was pleasantly surprised. It wasn’t the most potent, but it was smooth and tasted good. The main difference I noticed is that my bud wasn’t very dense. i think more time flowering would have helped. I look forward to trying again this year
Well I do have this bookmarked in the event our provinces settle down and cohere to federal laws… it is a shame they hold onto what they can. Anticipating the day I give growing a swing myself. Actually know what I would need thanks to this.